In this blog post, I will show you how to access different Azure resources, such as Azure Storage, directly from a SharePoint Framework (SPFx) using Azure API Management (APIM). This scenario is useful when you want to provide a seamless user experience for your application without exposing your backend services or credentials. This is a great way to simplify and secure your web app’s communication with the cloud.
There are often some requirements where we need to bring data from Azure into SharePoint and perform some operations over it, sometimes the lists & libraries don’t fit into business requirements.
There are a couple of options available in SharePoint Framework (SPFx) when accessing data from Azure.
- A SharePoint Framework (SPFx) web part or extension can call a secured Azure function, and then the secured Azure function can call an Azure resource. Call & Consume a secured Azure Function in SharePoint (SPFx)
- Directly consume Azure resources from the SharePoint Framework (SPFx) via Azure API Management.[We are going to look into this approach in this blog]
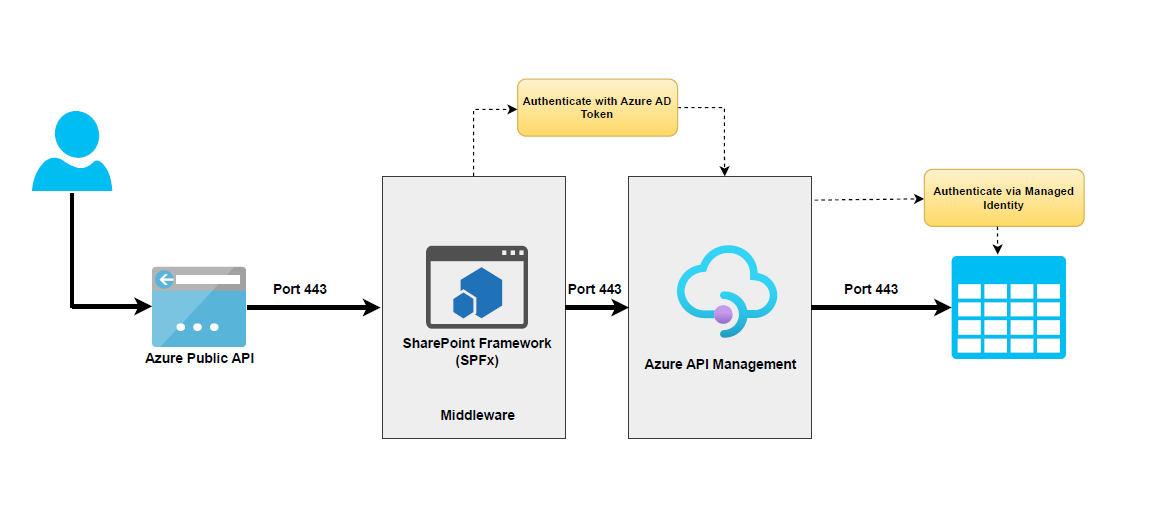
Solution Architecture
The basic flow is as follows:
- The SharePoint Framework (SPFx) webpart authenticates with Azure Active Directory (AAD) and obtains an access token.
- The SharePoint Framework (SPFx) makes a request to APIM with the access token in the header.
- APIM validates the access token using AAD token validation and CORS policies.
- APIM accesses the Azure resource via Azure managed identities and returns the response to the SharePoint Framework (SPFx) webpart.

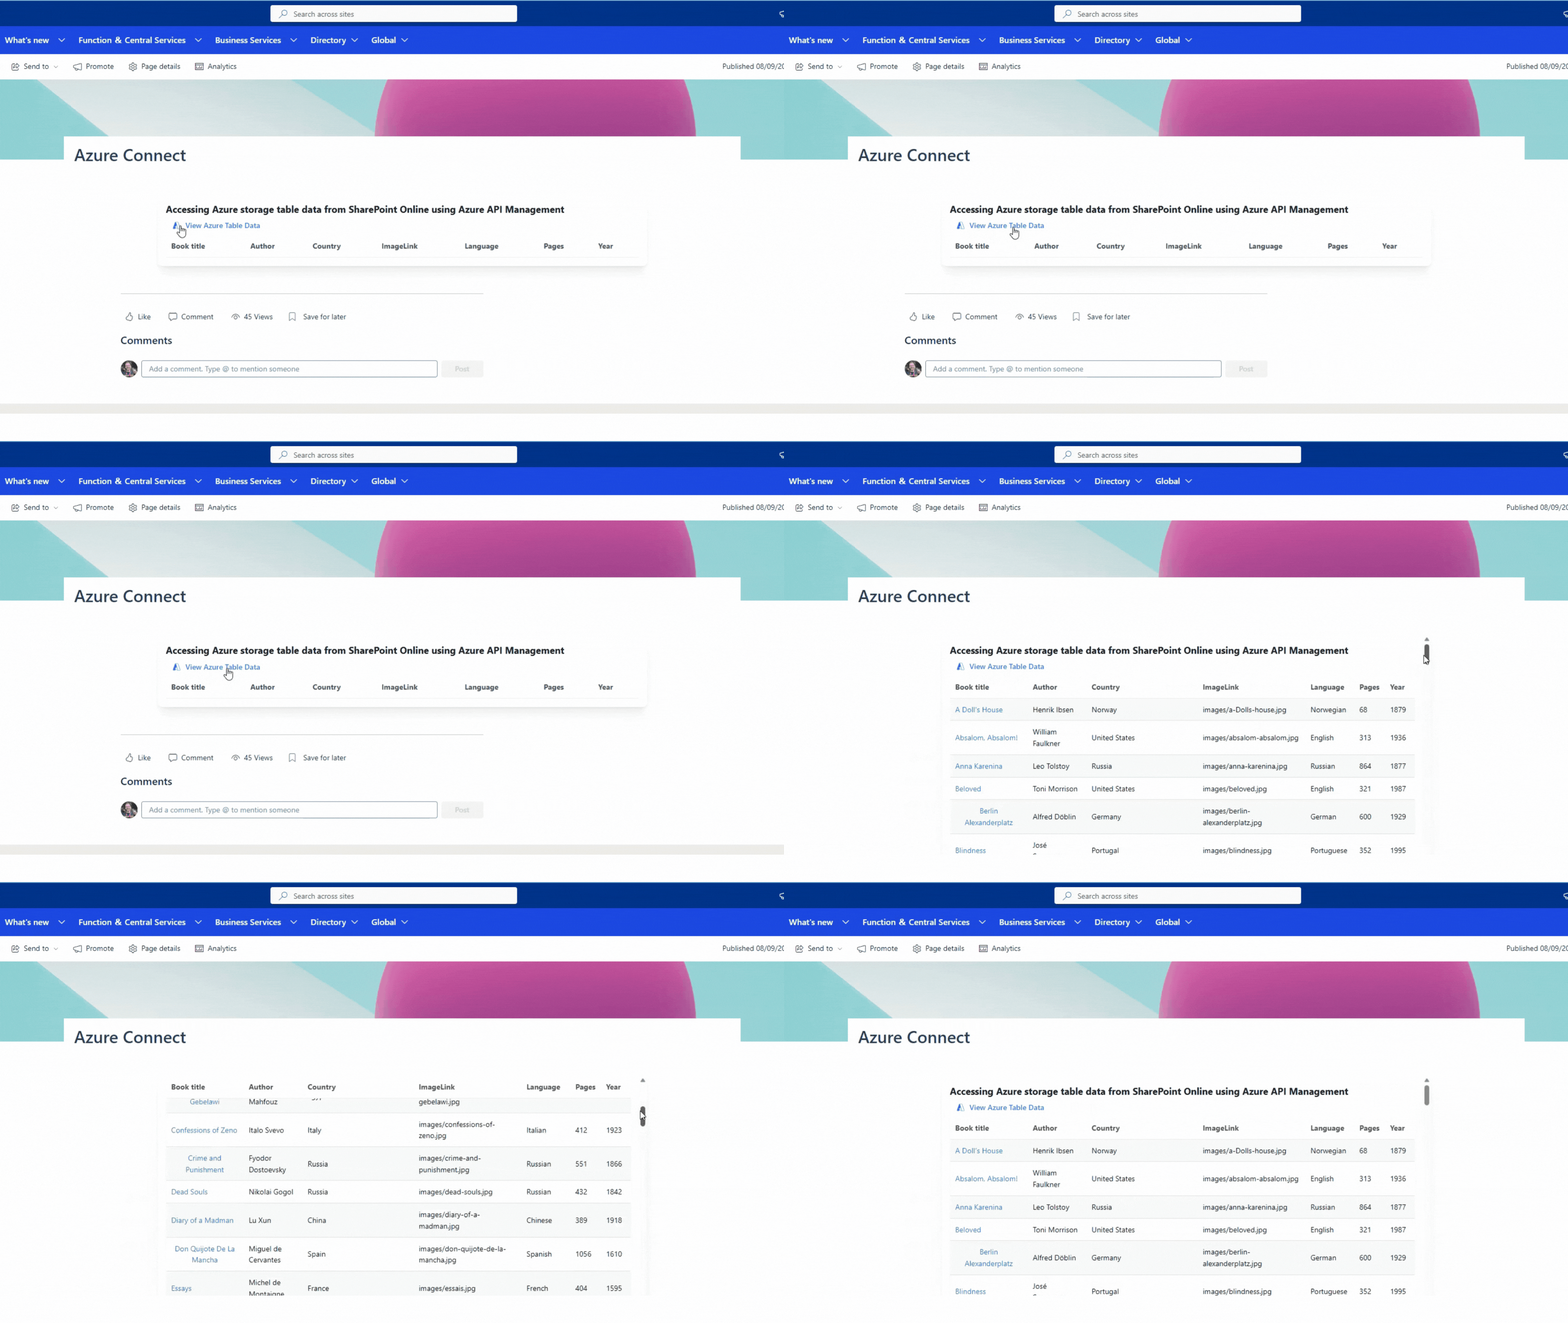
Demo

Implementation
To implement this scenario, you will need to configure the following components:
- An Azure Storage account to store some data in the Azure table.
- An APIM instance to expose and secure access to the Azure Storage account using Managed Identity.
- An AAD app registration for the SharePoint Framework (SPFx) web part to authenticate with AAD and obtain an access token.
- A SharePoint Framework (SPFx) web part that calls the APIM endpoint with the access token.
Let’s go through each step in detail.
Step 1: Create an Azure Storage account
- Go to the Azure portal and sign in to your account.
- Click the Storage Accounts blade.
- Click the Create button.
- In the Create storage account dialog, provide the following information:
o Name: The name of your storage account.
o Location: The region where you want to create your storage account.
o Account type: The type of storage account you want to create.
o Performance: The performance level of your storage account.
o Replication: The replication level of your storage account. - Click the Create button.
- Once your storage account is created, click the name of the storage account to open the storage account overview page.
- In the storage account overview page, click the Tables blade.
- Click the Add button to create a new table.
- In the Add Table dialog, provide the following information:
o Name: The name of your table.
o Partition key: The partition key for your table.
o Row key: The row key for your table. - Click the Create button.
Once you have created a table, you can start adding data to the table.
Step 2: Register an application in Azure AD to represent the API
The next step is to create an Azure AD app. This will allow us to authenticate our users with Azure AD and get an access token that we can use to call our Azure API management endpoint. To do this, follow these steps:
- In the Azure portal, search for and select App registrations.
- Select New Registration.
- When the Register an application page appears, enter your application’s registration information:
• In the Name section, enter a meaningful application name that will be displayed to users of the app, such as the backend-app.
• In the Supported Account Types section, select an option that suits your scenario. - Leave the Redirect URI section empty. Later, you’ll add a redirect URI generated in the OAuth 2.0 configuration in API Management.
- Select Register to create the application.
- On the app Overview page, find the Application (client) ID value and record it for later.
- Under the Manage section of the side menu, select Expose an API and set the Application ID URI as below. Record this value for later.
api://[Client ID]/[Tenant Name].sharepoint.com - Select the Add a Scope button to display the Add a Scope page:
a. Enter a Scope name for a scope that’s supported by the API (for example, user_impersonation).
b. In Who can consent? Make a selection for your scenario, such as Admins and users. Select Admins only for higher privileged scenarios.
c. Enter the Admin consent display name and Admin consent description.
d. Make sure the Enabled scope state is selected. - Select the Add Scope button to create the scope.
- Repeat the previous two steps to add all scopes supported by your API.
- Once the scopes are created, make a note of them for use in a subsequent step.
Step 3: Create an Azure API Management instance
The next step is to create an Azure API Management instance where we will expose our Azure resources as APIs. To do this, follow these steps:
- Go to the Azure portal and click on Create a resource.
- Search for API Management and click on Create.
- Fill in the details of your API Management instance, such as the name, region, pricing tier, etc.
- Click on Review + Create and then Create to create your API Management instance.
Step 4: Create an API for Azure Storage
Create an API
The next step is to create an API for our Azure Storage account in our API Management instance. To do this, follow these steps:
- Navigate to your API Management service in the Azure portal and select APIs from the menu.
- From the left menu, select + Add API.
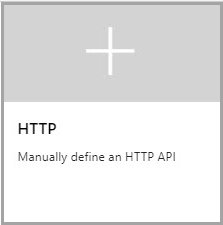
- Select HTTP from the list.

- Enter the backend Web service URL (In our case, Azure storage table URI,
https://[storageaccountname].table.core.windows.net/) and other settings for the API. The settings are explained in the Import and publish your first API tutorial. - Select Create.
At this point, you have no operations in API Management that map to the operations in your backend API. If you call an operation that is exposed through the back end but not through the API Management, you get a 404.
Note
By default, when you add an API, even if it's connected to some backend service, API Management won't expose any operations until you allow them. To allow an operation of your backend service, create an API Management operation that maps to the backend operation.
Add an operation
This section shows how to add a “/“ operation to map it to the Azure Storage Table endpoint https://[storageaccountname].table.core.windows.net/“ operation.
- Select the API you created in the previous step.
- Select + Add Operation.
- In the URL, select GET and enter
/in the resource. - Enter “Get Entities” for the Display name.
- Select Save.
Inbound processing
Next, you will need to configure some inbound policies for the APIM operation to validate the access token from AAD and access the Azure Storage account via managed identities.
I have configured the following policies during the inbound processing of API requests.
- Checking CORS to make a sure request can only be valid from your SharePoint tenant
- Validating the Azure AD token
- Read query parameters or headers if any
- Setting up backend API URL
- Managed identity integration with Azure resource
Step 5: Configure Azure Managed Identities for API
The next step is to configure Azure Managed Identities for our API. This will allow our API to access our Azure resources without storing any credentials or secrets in our code. To do this, follow these steps:
- Go to the Azure portal and click on your API Management instance.
- Click on Identity under Settings and enable System assigned identity. This will create a system-assigned managed identity for your API Management instance.
- Copy the Object ID of the identity. You will need it later.
- Go to your Azure Storage account and click on Access Control (IAM) under Settings.
- Click on Add role assignment and select Storage Table Data Reader as the role. For the assigned access option, select User assigned managed identity and search for the Object ID of your API Management instance’s identity. Select it and click on Save. This will grant your API Management instance’s identity access to read and write data in your storage account.
Step 6: Call the Azure API management
Finally, the Azure API management Azure storage table endpoint can be accessed with the access token via the SharePoint Framework (SPFx) web part.
If everything is configured correctly, you will receive results from the Azure storage table via Azure API management.
Source code
Tip
You can find the complete source code from GitHub.
